Graphstudio Proc Amp Control
Introduction
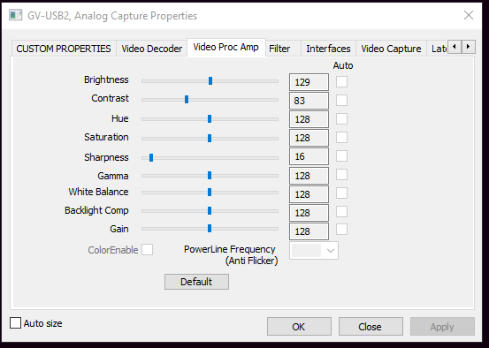
For good quality analogue tape captures, accurate setting of brightness and contrast is important. Depending on the particular tape, the default settings for the capture device ie stick or card may not be the ideal settings. This may result in “blown out” whites, where detail in the white area is lost, or overly black dark areas. Adjusting the brightness and contrast to lower the white or brighten the dark areas may result in a more balanced image. This is a typical procamp control panel: Some setups do not allow dynamic, on-the-fly adjustments to the brightness and contrast using the procamp controls in the capture software itself. Some software setups do not allow Access to the procamp at all. The method described here permits access to the procamp controls during playing/capture of the tape, allowing much easier and quicker setting of the levels. In general terms, we install Graphstudio and use that to access the procamp.Install Graphstudio
Get Graphstudio from here: https://www.videohelp.com/software/graphstudio There are two versions; the “64 bit” version is for 64 bit Windows systems and the other is for 32 bit systems. Graphstudio doesn’t actually “install”, it simply runs as a portable program when the EXE file is run. It will therefore need to be extracted from the Zip file: move the Zip file to a location of your choice, then right-click and choose Extract All… Click “Extract”, then open the folder and double-click the Graphstudionext.exe file to start it.Controlling the ProcAmp
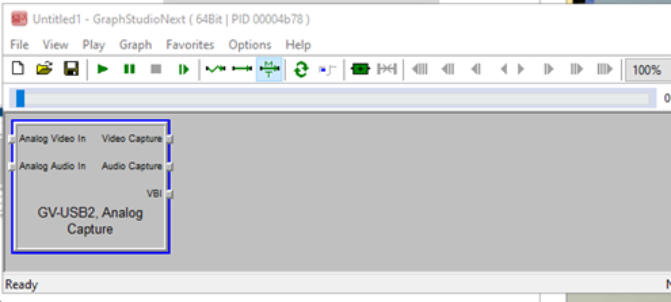
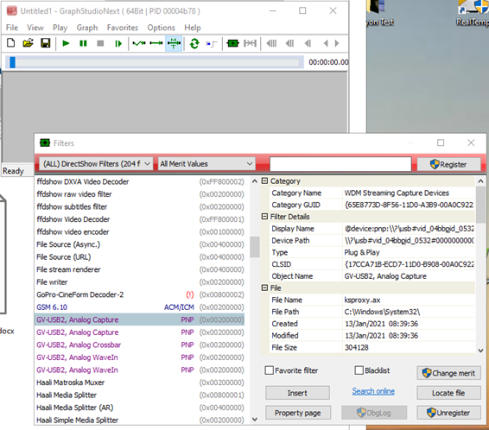
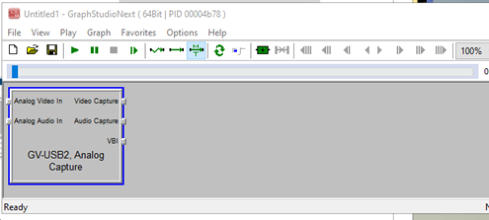
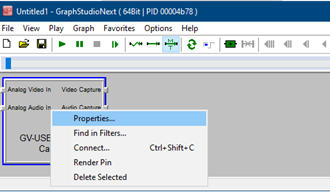
Follow these steps: 1. Plug in your digitiser and start up your capture program so you can view the preview screen. 2. Run the Graphstudio EXE file. 3. On the Graph menu, click Insert Filter. This screen will appear: The left column shows the various video filters on your system. Scroll to locate the filter for your digitiser. In this case, the digitiser is an IO Data GV-USB2. 4. Click on the “Analogue Capture” line for your capture stick or card (either will do), as shown above, then click Insert and close that box. You’ll be presented with this, showing your capture device in a box: 5. Right-click on the box for your capture device, then choose Properties: This screen will then be displayed: 6. Open the “Video Proc Amp” tab and you’ll gain access to the procamp controls as shown in the image at the top of this page. You can now watch the video and adjust the brightness and contrast (and the others) in real time.Saving the Graphstudio setup
Save the Graphstudio setup using File>Save as Graph (GRF). You can then use that GRF file to quickly re-open the graph next time. For users of AVISynth, the GRF file can be used as a source video, then the AVS can be opened in Media Player Classic to display a real-time Histogram for use with AmaRecTV. This only works for some digitisers. For example, it will work with the Startech USB3HDCAP, but not the GV-USB2 nor the USBLive-2.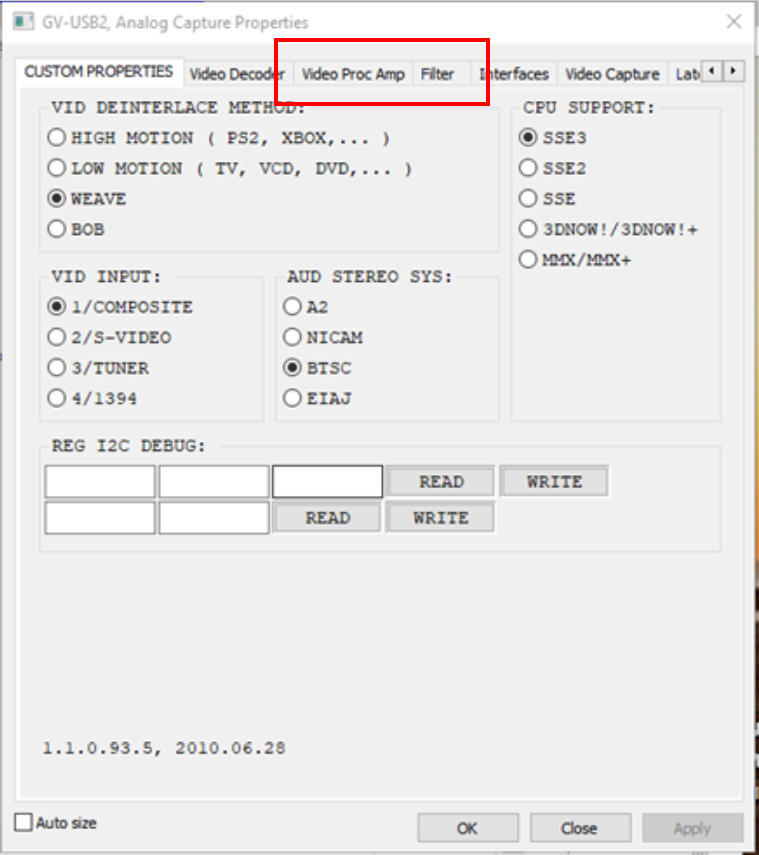


Thanks to @Jagabo from Videohelp.com for explaining this procedure.
Introduction
For good quality analogue tape captures, accurate setting of brightness and contrast is important. Depending on the particular tape, the default settings for the capture device ie stick or card may not be the ideal settings. This may result in “blown out” whites, where detail in the white area is lost, or overly black dark areas. Adjusting the brightness and contrast to lower the white or brighten the dark areas may result in a more balanced image. This is a typical procamp control panel: Some setups do not allow dynamic, on-the-fly adjustments to the brightness and contrast using the procamp controls in the capture software itself. Some software setups do not allow Access to the procamp at all. The method described here permits access to the procamp controls during playing/capture of the tape, allowing much easier and quicker setting of the levels. In general terms, we install Graphstudio and use that to access the procamp.Install Graphstudio
Get Graphstudio from here: https://www.videohelp.com/software/graphstudio There are two versions; the “64 bit” version is for 64 bit Windows systems and the other is for 32 bit systems. Graphstudio doesn’t actually “install”, it simply runs as a portable program when the EXE file is run. It will therefore need to be extracted from the Zip file: move the Zip file to a location of your choice, then right-click and choose Extract All… Click “Extract”, then open the folder and double-click the Graphstudionext.exe file to start it.Controlling the ProcAmp
Follow these steps: 1. Plug in your digitiser and start up your capture program so you can view the preview screen. 2. Run the Graphstudio EXE file. 3. On the Graph menu, click Insert Filter. This screen will appear: The left column shows the various video filters on your system. Scroll to locate the filter for your digitiser. In this case, the digitiser is an IO Data GV- USB2. 4. Click on the “Analogue Capture” line for your capture stick or card (either will do), as shown above, then click Insert and close that box. You’ll be presented with this, showing your capture device in a box: 5. Right-click on the box for your capture device, then choose Properties: This screen will then be displayed: 6. Open the “Video Proc Amp” tab and you’ll gain access to the procamp controls as shown in the image at the top of this page. You can now watch the video and adjust the brightness and contrast (and the others) in real time.Saving the Graphstudio setup
Save the Graphstudio setup using File>Save as Graph (GRF). You can then use that GRF file to quickly re-open the graph next time. For users of AVISynth, the GRF file can be used as a source video, then the AVS can be opened in Media Player Classic to display a real-time Histogram for use with AmaRecTV. This only works for some digitisers. For example, it will work with the Startech USB3HDCAP, but not the GV-USB2 nor the USBLive-2.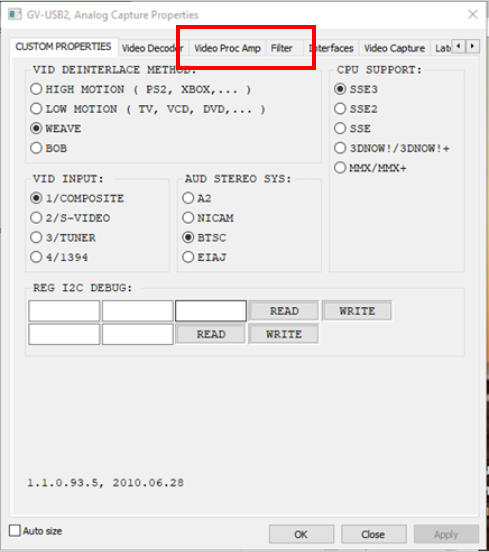
Graphstudio
Proc Amp Control