Scenalyzer
Introduction
Thank You
A big Thank You to Andreas Winter, who created the program. He has very kindly made the program available for free:
http://www.scenalyzer.com/
What Is Scenalyzer For
Scenalyzer is for capturing Standard Definition (SD) DV format video from camcorders using the IEEE1394 Firewire
cabling/transfer system, such as mini-DV camcorders and Digital 8 camcorders, or camcorders and devices that can
transfer DV over USB.
Why Use Scenalyzer
Most video editing programs can capture DV directly, without using a third-party program such as Scenalyzer.
However, they may not capture the files with a user-friendly name eg with date and time of each shot/scene.
Scenalyzer does this: it will capture each scene (or each day’s video in one scene, if desired) so that future
manipulation and cataloguing of the files is simplified. For example, I have all my video scenes named in date-time
format in dated folders so I can instantly go to an event, or alternatively, I can see all the files from a particular event
together, sorted by date.
Setup
Installation
http://www.scenalyzer.com/
Download the Zip file into a folder of your choice, then unzip it by right-clicking and choosing “Extract All…, then
“Extract”. Windows will extract the three files from the zip into a folder. Open that folder to get access to the EXE file.
The other files are the registration number file and the PDF manual.
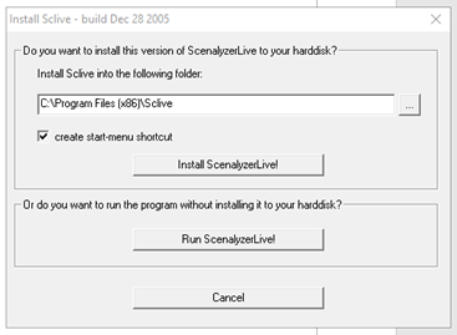
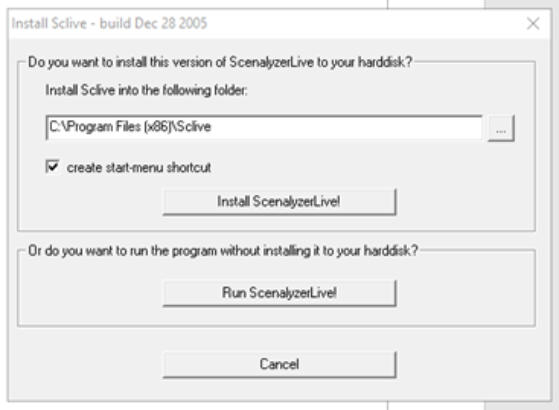
Double-click the EXE file. You can then install it, or run it in Portable mode using the “Run Scenalyzer Live!” button.
Portable mode means it will run without actually installing itself onto your computer:
If prompted for a licence number or you get a flashing “Scenalyzer Live” logo on your videos, copy and paste the
licence number from the “Licence.txt” file in the folder that you unzipped before into Help>Enter Registration Number.
Capture Settings
Start Scenalyzer.
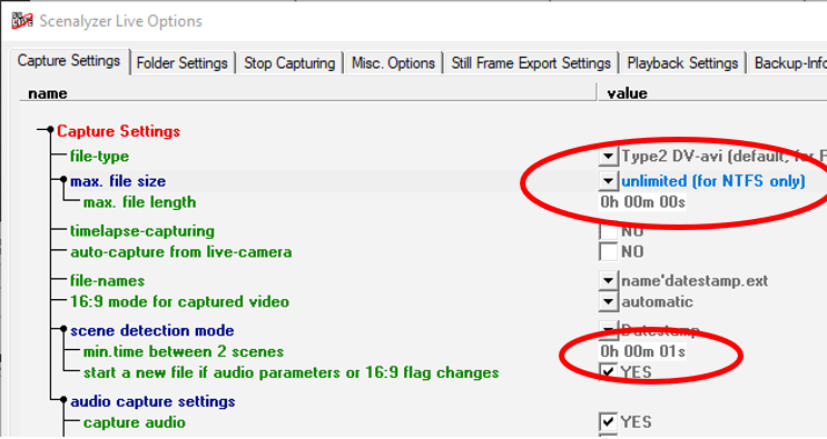
File>Options>Capture Settings Tab
•
Change Max File Size to “Unlimited (for NTFS only)”, then click OK.
•
Change scene detection “min time between 2 scenes” if necessary. This is the time between clips that
Scenalyzer will use to create a new capture file. 1 sec means each scene with a gap of more than 1 sec from the last
scene ending will start a new scene/file. If it was set to say 12 hours, all video taken less than 12 hours ago would be
captured into one file. 1 sec is suggested.
Click OK to close the Settings box.
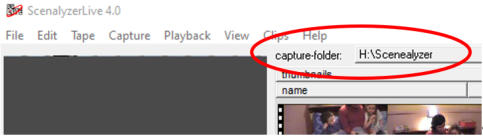
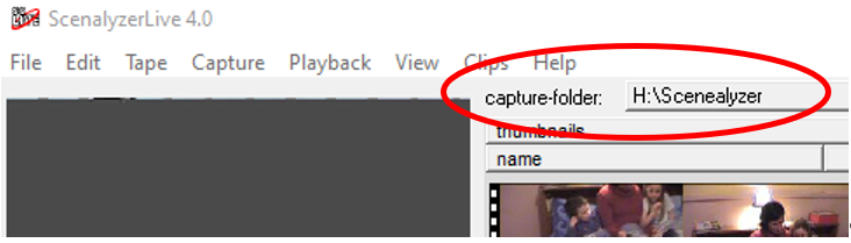
Set up Capture Folder
Click the capture-folder button and set your desired capture folder:
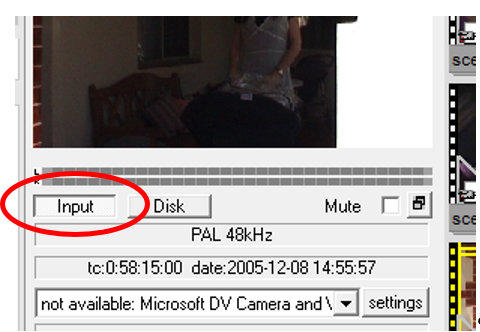
Input button – click to select it
Below the monitor:
This will display the input folder in the main window, as well as activate the Preview window above.
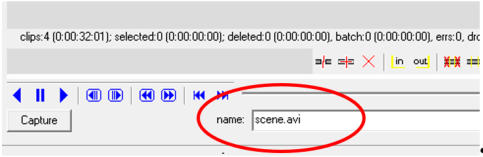
Insert Capture File Name
At the bottom of the window, choose a capture file name and type it in:
The date and time will be appended to the “Name”.
Connect your Camera to the computer
Ensure your camcorder is switched off to minimise the chance of an electrical short-circuit.
If using Firewire, ensure the Firewire cable is firmly and securely plugged in the computer’s Firewire port. Canon HV
series camcorders have been irreversibly damaged by short circuits caused by incorrectly fitted Firewire cables.
Connect your camera to the computer using the Firewire cable.
If using DV over USB, connect your camcorder to the PC using a USB cable: Type A male and Type Micro B male.
Turn your camcorder On and place it in Player/VCR/VTR mode.
Ensure your camcorder is in DV mode (for the Canon HV series, with the main switch in Play, the playback mode is
displayed at the top of the screen: DV/A/HDV. DV must be displayed. If not, press the FUNC button, select Menu and
press, then select PLAY OUT/SETUP1 and press, then change the PLAYBACK STD to DV and press. Press the
FUNC button to exit.
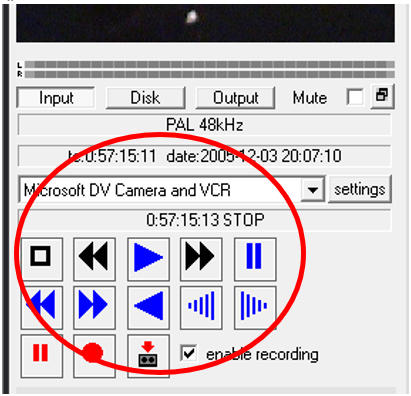
When you have connected and powered on successfully, choose “Microsoft DV Camera and VCR” (Firewire) or
“Video Edit” (DV over USB) from the droplist just below the monitor window and the control buttons will appear in the
window below the preview window:
The buttons can be used to control the camcorder:
Note: for the Canon HV series, if “Canon HV20” is displayed, the camcorder is in HDV mode. While Scenalyzer will
control the camera, no video will be transferred as Scenalyzer cannot read HDV-format video.
Capture Video
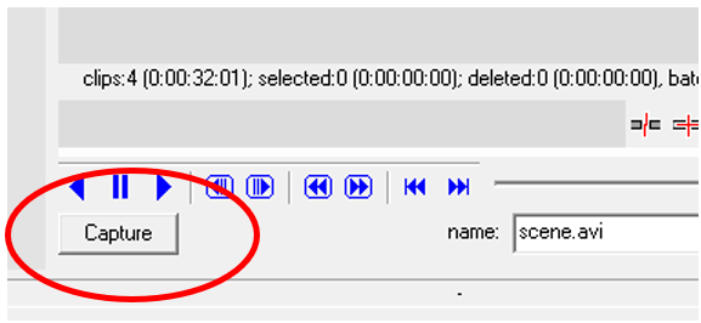
To Start Capture
When ready to capture, at the bottom, click “Capture”:
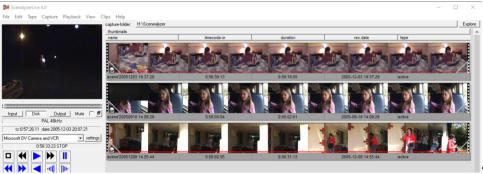
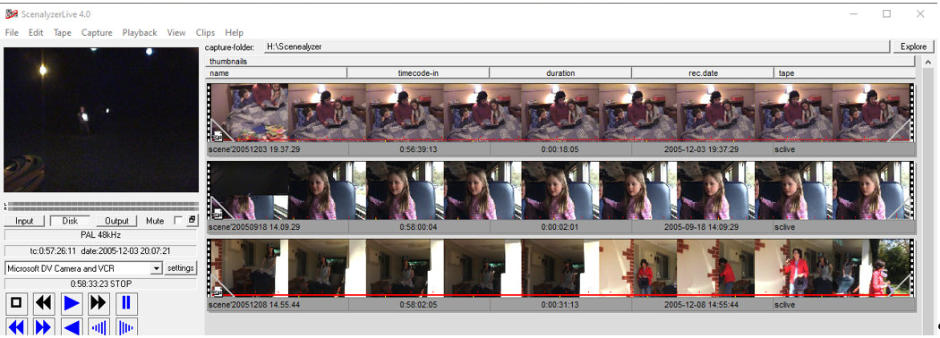
Scenalyzer will start the camcorder and the recorded video will start appearing in the main window.
As a new scene is detected, it will appear as a new scene below the previous scene:
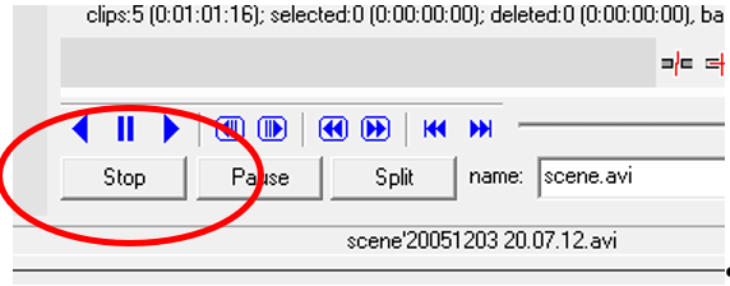
To Stop Capture
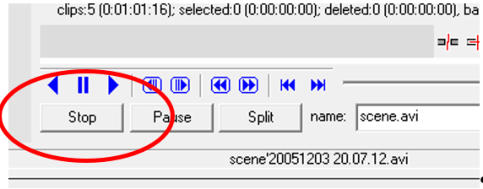
To stop capturing, click Stop:
And that’s it. You now have digitally transferred your DV videos to your computer.
Post Capture
The videos can now be opened in your video editing program from the folder they were captured into.
They can be played in VLC Player.
Scenalyzer has extensive editing capabilities such as splitting, trimming and joining your clips, with no re-encoding
involved.


Scenalyzer
Introduction
Thank You
A big Thank You to Andreas Winter, who created
the program. He has very kindly made the program
available for free:
http://www.scenalyzer.com/
What Is Scenalyzer For
Scenalyzer is for capturing Standard Definition (SD)
DV format video from camcorders using the
IEEE1394 Firewire cabling/transfer system, such as
mini-DV camcorders and Digital 8 camcorders, or
camcorders and devices that can transfer DV over
USB.
Why Use Scenalyzer
Most video editing programs can capture DV
directly, without using a third-party program such as
Scenalyzer. However, they may not capture the files
with a user-friendly name eg with date and time of
each shot/scene. Scenalyzer does this: it will
capture each scene (or each day’s video in one
scene, if desired) so that future manipulation and
cataloguing of the files is simplified. For example, I
have all my video scenes named in date-time
format in dated folders so I can instantly go to an
event, or alternatively, I can see all the files from a
particular event together, sorted by date.
Setup
Installation
http://www.scenalyzer.com/
Download the Zip file into a folder of your choice,
then unzip it by right-clicking and choosing “Extract
All…, then “Extract”. Windows will extract the three
files from the zip into a folder. Open that folder to
get access to the EXE file. The other files are the
registration number file and the PDF manual.
Double-click the EXE file. You can then install it, or
run it in Portable mode using the “Run Scenalyzer
Live!” button. Portable mode means it will run
without actually installing itself onto your computer:
If prompted for a licence number or you get a
flashing “Scenalyzer Live” logo on your videos,
copy and paste the licence number from the
“Licence.txt” file in the folder that you unzipped
before into Help>Enter Registration Number.
Capture Settings
Start Scenalyzer.
File>Options>Capture Settings Tab
•
Change Max File Size to “Unlimited (for NTFS
only)”, then click OK.
•
Change scene detection “min time between 2
scenes” if necessary. This is the time between clips
that Scenalyzer will use to create a new capture
file. 1 sec means each scene with a gap of more
than 1 sec from the last scene ending will start a
new scene/file. If it was set to say 12 hours, all
video taken less than 12 hours ago would be
captured into one file. 1 sec is suggested.
Click OK to close the Settings box.
Set up Capture Folder
Click the capture-folder button and set your desired
capture folder:
Input button – click to select it
Below the monitor:
This will display the input folder in the main window,
as well as activate the Preview window above.
Insert Capture File Name
At the bottom of the window, choose a capture file
name and type it in:
The date and time will be appended to the “Name”.
Connect your Camera to the computer
Ensure your camcorder is switched off to minimise
the chance of an electrical short-circuit.
If using Firewire, ensure the Firewire cable is firmly
and securely plugged in the computer’s Firewire
port. Canon HV series camcorders have been
irreversibly damaged by short circuits caused by
incorrectly fitted Firewire cables.
Connect your camera to the computer using the
Firewire cable.
If using DV over USB, connect your camcorder to
the PC using a USB cable: Type A male and Type
Micro B male.
Turn your camcorder On and place it in
Player/VCR/VTR mode.
Ensure your camcorder is in DV mode (for the
Canon HV series, with the main switch in Play, the
playback mode is displayed at the top of the
screen: DV/A/HDV. DV must be displayed. If not,
press the FUNC button, select Menu and press,
then select PLAY OUT/SETUP1 and press, then
change the PLAYBACK STD to DV and press.
Press the FUNC button to exit.
When you have connected and powered on
successfully, choose “Microsoft DV Camera and
VCR” (Firewire) or “Video Edit” (DV over USB) from
the droplist just below the monitor window and the
control buttons will appear in the window below the
preview window:
The buttons can be used to control the camcorder:
Note: for the Canon HV series, if “Canon HV20” is
displayed, the camcorder is in HDV mode. While
Scenalyzer will control the camera, no video will be
transferred as Scenalyzer cannot read HDV-format
video.
Capture Video
To Start Capture
When ready to capture, at the bottom, click
“Capture”:
Scenalyzer will start the camcorder and the
recorded video will start appearing in the main
window.
As a new scene is detected, it will appear as a new
scene below the previous scene:
To Stop Capture
To stop capturing, click Stop:
And that’s it. You now have digitally transferred your
DV videos to your computer.
Post Capture
The videos can now be opened in your video
editing program from the folder they were captured
into.
They can be played in VLC Player.
Scenalyzer has extensive editing capabilities such
as splitting, trimming and joining your clips, with no
re-encoding involved.